Welcome back – let’s continue our series on Microsoft Entra Private Access! If you missed Part 1, you can check it out here: Exploring Microsoft Entra Private Access. Let’s dive into the nitty-gritty of installing the GSA client, applying Conditional Access policies, and tackling some basic troubleshooting.
Installing the GSA Client
First things first, let’s get that GSA client up and running. Head over to Entra, navigate to Global Secure Access > Client Download, and pick your operating system. Easy, right? Once downloaded, you’ll have the executable file ready to deploy.
If you’re managing devices through Intune (like I am), you’ll want to deploy this smoothly. While I won’t bore you with the step-by-step packaging instructions, here’s the key installation command you’ll need:
GlobalSecureAccessClient.exe /install /quiet

Lock It Down: Restricting User Controls
Now, what if you don’t want standard users toggling the GSA client on and off like it’s their personal light switch? No worries — Intune has got you covered. Using a remediation script, you can ensure only admins have the power to enable or disable the client.
Here’s is what the detection script looks like:
# Get the value of the "RestrictNonPrivilegedUsers" registry key for GSA Client
$RegistryPath = "HKLM:\Software\Microsoft\Global Secure Access Client"
$ValueName = "RestrictNonPrivilegedUsers"

# Check if the registry key exists and is set to 1
if (Test-Path $RegistryPath) {
    $Value = Get-ItemProperty -Path $RegistryPath -Name $ValueName -ErrorAction SilentlyContinue
    if ($Value.$ValueName -eq 1) {
        Write-Host "The value of the $ValueName registry key is set to 1. Exiting script."
        Exit 0
    } else {
        Write-Host "The value of the $ValueName registry key is not set to 1. Running Remediation."
        Exit 1
    }
}
And for remediation? It’s just as straightforward:
# Get the value of the "RestrictNonPrivilegedUsers" registry key for GSA Client
$RegistryPath = "HKLM:\Software\Microsoft\Global Secure Access Client"
$ValueName = "RestrictNonPrivilegedUsers"

try {
    # Check if the registry key exists
    if (Test-Path $RegistryPath) {
        $Value = Get-ItemProperty -Path $RegistryPath -Name $ValueName -ErrorAction Stop
        if ($Value.$ValueName -eq 1) {
            Write-Host "The value of the $ValueName registry key is set to 1. Exiting script."
            Exit 0
        } else {
            Write-Host "The value of the $ValueName registry key is not set to 1. Running Remediation."
            Set-ItemProperty -Path $RegistryPath -Name $ValueName -Value 1
            Write-Host "The value of the $ValueName registry key has been set to 1."
            Exit 1
        }
    } else {
        Write-Host "The registry path does not exist. Creating path and setting value."
        New-Item -Path $RegistryPath -Force | Out-Null
        New-ItemProperty -Path $RegistryPath -Name $ValueName -Value 1 -PropertyType DWORD -Force | Out-Null
        Write-Host "The value of the $ValueName registry key has been created and set to 1."
        Exit 1
    }
} catch {
    Write-Error "An error occurred: $_"
    Exit 1
}
With these scripts in place, standard users can’t tamper with the client. Problem solved!
Securing the Connection: Conditional Access
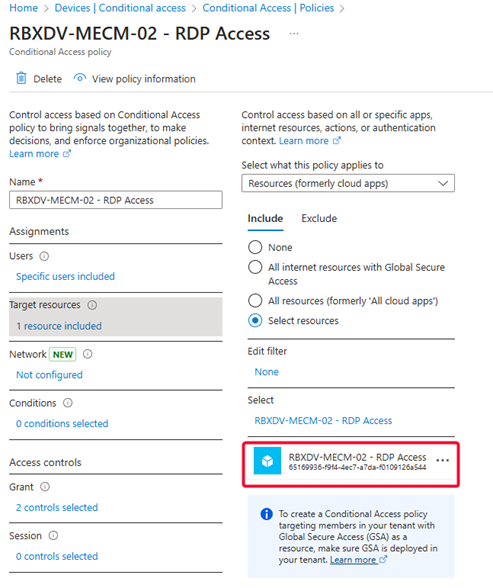
Now that the GSA client is installed, let’s make it work harder for us. Conditional Access policies add an extra layer of security - for my setup, I created a policy that requires:
Phishing-resistant MFA
A compliant device
This ensures only trusted users on managed devices can access sensitive resources. When I connect to my server, GSA prompts me to sign in — no exceptions. After authenticating successfully, I’m securely connected.

My grant controls to access this RDP connection are to require Phishing-resistant MFA, as well as a compliant device. If both of those are true, then we will be allowed access.

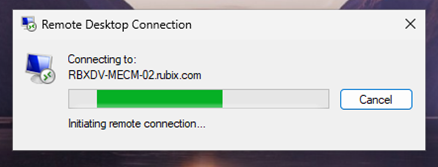
When I make my connection to my server from my compliant device, we can see that GSA is prompting me to Sign In.


Again, this is simply because of my requirements for Phishing-resistant MFA and Intune compliance.

If you're diving into Conditional Access and GSA, don't miss out on Universal Continuous Access Evaluation! This feature boosts security by making sure Entra ID keeps a sharp eye on identity changes, triggering near real-time reauthentication to keep things locked down. I will do a deeper dive on this feature in a later blog.
Troubleshooting Made Simple
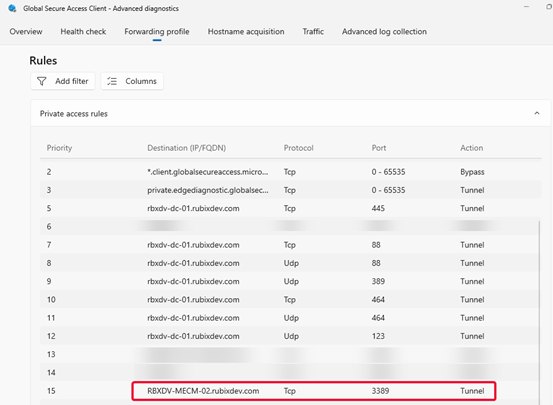
What about those inevitable hiccups? Don’t sweat it — the GSA client’s advanced diagnostics have your back. Simply right-click the GSA icon in your system tray and select Advanced Diagnostics. From there, you can:
Check the health of your client.
Review Private Access rules.
Analyze network traffic in detail.
It’s like having a Swiss Army knife for your troubleshooting needs.

Once in advanced diagnostics, we can check the health of our client, specific Private Access rules, and analyzing network traffic on your device through the GSA client.

Wrapping Up
And that’s a wrap for Part 2 of our series! Installing the GSA client, applying Conditional Access, and using advanced diagnostics are essential steps in mastering Microsoft Entra Private Access. Stay tuned for more insights, tips, and tricks in future posts.
This post originally appeared on Rubix - Solving for the Modern Workplace.
