Alright, let’s be real—passwords are the worst. If you can, ditch them altogether and embrace the wonderful world of passwordless authentication. But if you’re stuck with passwords for the time being, at least let’s make them a little less terrible, shall we?
That’s where Microsoft Entra Password Protection comes in. It’s a simple but powerful tool that blocks weak and commonly used passwords, using both Microsoft’s global banned password list and your own custom list. That means no more “Winter2024!” or “CompanyName123.” Plus, if your users have a habit of using something super obvious—like, say, “Rubix” you can block that too.
Setting Up Password Protection in Your Tenant
First, let’s grab the required files:
AzureADPasswordProtectionDCAgentSetup.msi
AzureADPasswordProtectionProxySetup.exe
Microsoft provides a handy diagram below on how this all works, but let’s break it down step by step.
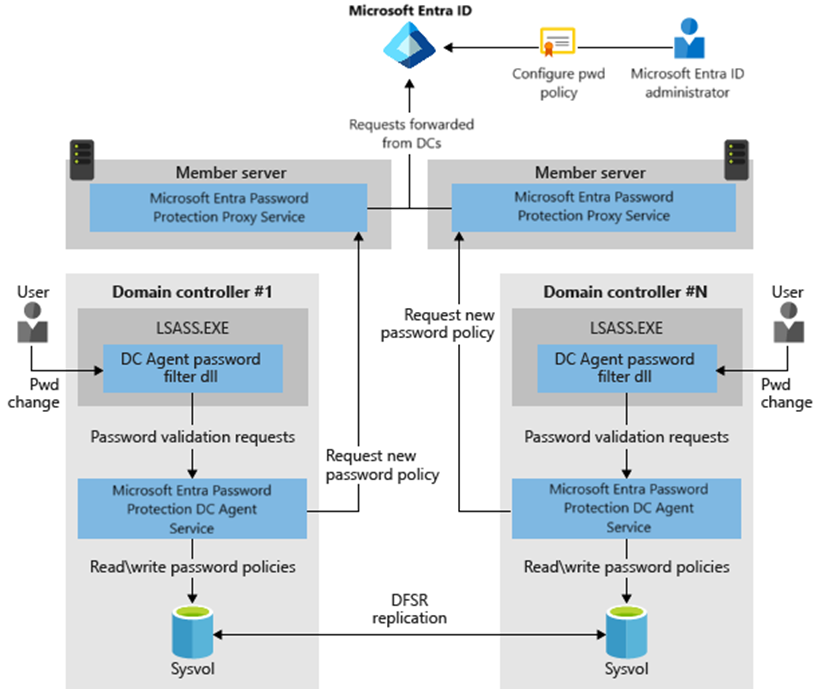
Step 1: Setting Up the Password Protection Proxy
Microsoft has a few prerequisites, but the general process goes like this:
Install the proxy setup file on a designated server. If you’re in a production environment, it’s best to have multiple proxies for redundancy. (I’m just using one in my test setup.)
The installer will not prompt you for a restart, but trust me, just go ahead and reboot. It helps.

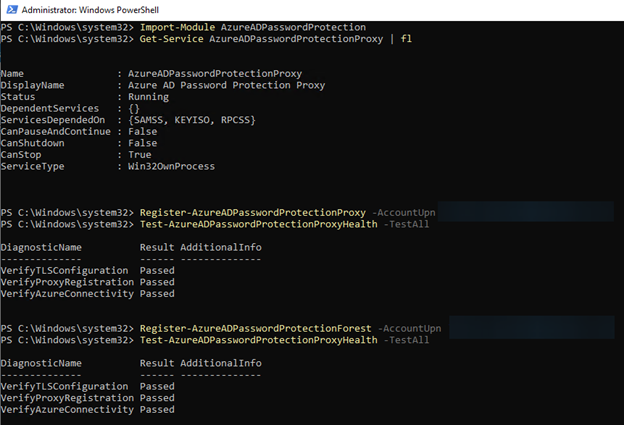
Step 2: Register the Proxy Service
Now that our proxy service server is up and running, we need to register it. Here’s what you need to do:
Import the AzureADPasswordProtection module.
Make sure the password protection proxy service is running.
Run the following command (with Global Admin credentials the first time you do this):
Register-AzureADPasswordProtectionProxy -AccountUpn 'globaladmin@tenant.domain.com'4. After that, test your setup to confirm everything is working as expected.
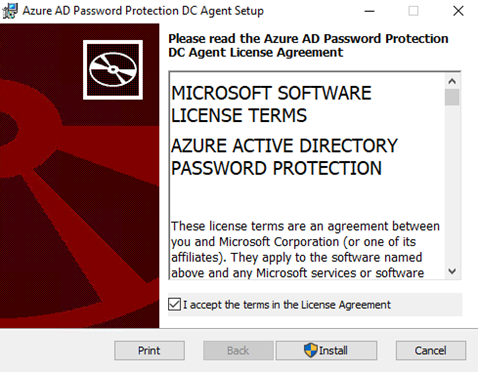
Step 3: Register Your On-Premises Active Directory
Next up, we install the DC Agent on all domain controllers. It’s a super simple install—just click a button, let it do its thing, and restart when prompted. (Yes, another restart. Just go with it.) Be sure to grab the prerequisites for this installation.
After rebooting, we run similar commands as before to verify everything is properly registered. If all checks pass, we’re good to move on.

Configuring Password Protection in Entra
Now that our on-premises setup is done, let’s configure our policies in Entra:
Head over to Authentication Methods > Password Protection.
Set up the Password Protection policy, including Smart Lockout and your custom banned password list.
Want to block specific words? Go for it! In my case, I’m banning anything that resembles “Rubix.” And just for fun, I’m also blocking “poptart” because Steve is obsessed with them. (Sorry, Steve.)
Enable Password Protection on Windows Server AD to enforce the policies we just created.
Set Mode to Audit first so you can see what passwords are getting flagged before enforcing it.

Putting It to the Test
Once everything is in place, I tried changing my password to something resembling “poptart” and—boom—rejected faster than a vegetarian at a BBQ competition.

A quick check of the event logs under: \Applications and Services Logs\Microsoft\AzureADPasswordProtection\DCAgent\Admin confirmed that my new password was rejected due to Azure’s Password Policy. Success!

Final Thoughts
Entra Password Protection is an easy way to step up your security game while still keeping things simple for your users. It helps eliminate those embarrassingly weak passwords, protects your organization from brute-force attacks, and lets you have a little fun customizing your banned password list (within reason, of course).
So go ahead—give it a try, ban some bad passwords, and sleep a little better at night knowing your users won’t be securing their accounts with “Password123!” anymore.
This post originally appeared on Rubix - Solving for the Modern Workplace.